This Rice Krispy Treat No-Bake Cheesecake is the ultimate dessert for anyone seeking easy, delicious sweetness without the fuss of baking. It’s creamy, crunchy, and perfectly satisfying, making it an ideal treat for gatherings or a cozy night in. Plus, it’s customizable, so you can add your favorite flavors or toppings for a personal touch.
Recipe Information
Prep Time: 15 minutes
Cook Time: 10 minutes
Total Time: 4 hours 25 minutes
Servings: 12
Difficulty Level: Easy
Nutrition Information (per serving)
Calories: 280
Protein: 3g
Carbohydrates: 34g
Fat: 15g
Fiber: 0g
Sugar: 15g
Sodium: 120mg
Why Make Rice Krispy Treat No-Bake Cheesecake
This Rice Krispy Treat No-Bake Cheesecake is not just a dessert; it’s a symphony of textures and flavors that everyone loves. With creamy cheesecake filling sitting atop a crispy, chewy crust, it’s a crowd-pleaser that requires minimal time and effort. It’s perfect for busy days when you want an impressive treat without turning on the oven. Plus, with its simple ingredients, you can whip this up on a whim and enjoy it anytime!
How to Make Rice Krispy Treat No-Bake Cheesecake Step by Step
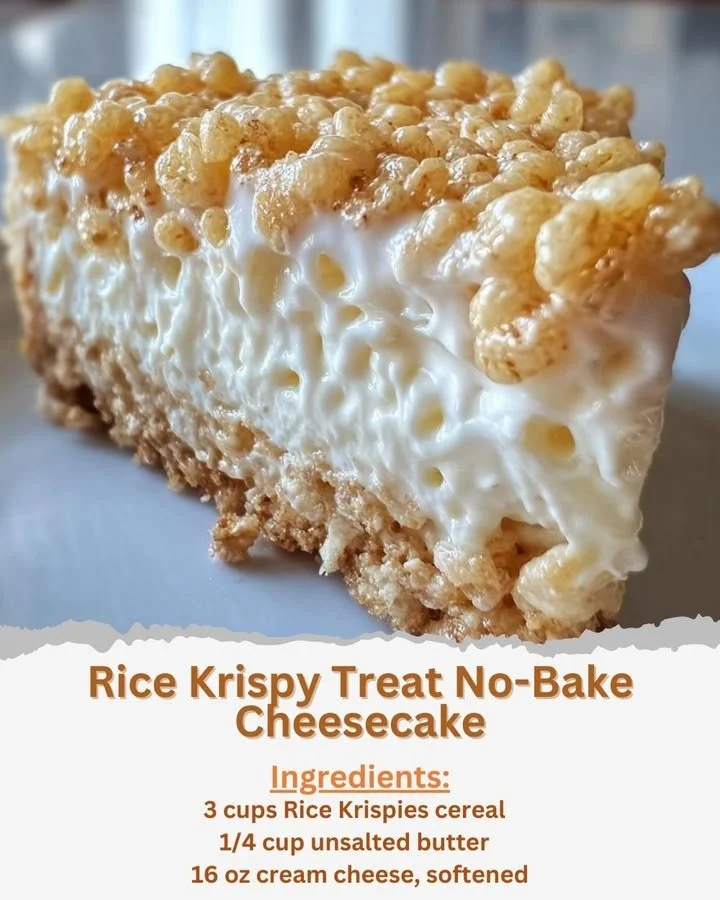
Ingredients
3 cups Rice Krispies cereal
1/4 cup unsalted butter
1 package (10 oz) marshmallows
16 oz cream cheese, softened
1 cup powdered sugar
1 teaspoon vanilla extract
1 cup heavy whipping cream
Directions
- In a large saucepan, melt the butter over low heat.
- Add the marshmallows and stir continuously until completely melted and smooth.
- Remove from heat and immediately stir in the Rice Krispies cereal until fully coated.
- Press the mixture evenly into the bottom of a 9-inch springform pan to form the crust. Set aside.
- In a mixing bowl, beat the cream cheese until smooth and creamy.
- Add the powdered sugar and vanilla extract, and continue beating until combined.
- In a separate bowl, whip the heavy cream until stiff peaks form.
- Gently fold the whipped cream into the cream cheese mixture until fully incorporated.
- Pour the cheesecake filling over the Rice Krispies crust and spread evenly.
- Refrigerate for at least 4 hours or until firm before serving.

How to Serve Rice Krispy Treat No-Bake Cheesecake
This dessert is delightful on its own, but you can elevate it with a drizzle of caramel or chocolate sauce. Pair it with fresh berries for a refreshing contrast or serve it alongside a scoop of vanilla ice cream for added indulgence. You might also consider a light fruit salad on the side to balance the richness.
How to Store Rice Krispy Treat No-Bake Cheesecake
To store this cheesecake, keep it in the fridge covered with plastic wrap or aluminum foil. It can last for about 3-4 days. For longer storage, consider freezing it. Slice the cheesecake into portions before wrapping each piece tightly in plastic wrap and then aluminum foil. It can be frozen for up to three months. When you’re ready to enjoy, simply thaw it in the refrigerator overnight.
Expert Tips for Cooking Rice Krispy Treat No-Bake Cheesecake
- Use fresh marshmallows for the best texture and flavor.
- Allow the cream cheese to soften completely for a smoother filling.
- Experiment with flavorings, like lemon or almond extract, to customize the cheesecake.
- Ensure the heavy cream is cold before whipping for the best volume.
- For a fun twist, add colorful sprinkles to the top before serving!
Delicious Variations of Rice Krispy Treat No-Bake Cheesecake
For a chocolate lover’s dream, add cocoa powder to the cream cheese mixture for a chocolate-flavored cheesecake. You could also incorporate crushed fruit like strawberries or blueberries into the filling for a fruity version, or try adding a touch of espresso powder for a mocha flavor.
This Rice Krispy Treat No-Bake Cheesecake is easy to whip up and absolutely delicious. Perfect for any occasion, you’ll find that it impresses everyone with its delightful combination of flavors and textures. So gather your ingredients and treat yourself to this fantastic dessert today!