Step-by-step instructions
Let’s get baking! Follow these straightforward directions to create your Apple Crisp Cheesecake:
- Preheat the oven to 350°F (175°C).
- In a mixing bowl, beat the cream cheese and sugar together until smooth.
- Add the eggs one at a time, mixing well after each addition.
- Stir in the vanilla extract and ground cinnamon until combined.
- Fold in the sour cream gently to maintain a fluffy texture.
- Pour the cheesecake mixture into a greased springform pan, spreading it evenly.
- Carefully spoon the apple pie filling over the cheesecake layer.
- In a separate bowl, combine the crushed oatmeal cookies, rolled oats, and melted butter. Mix until crumbly.
- Sprinkle this crumbly mixture generously over the apple pie filling.
- Bake your cheesecake for 50-60 minutes or until the center is set.
- Once baked, let it cool before serving to allow the flavors to meld beautifully.
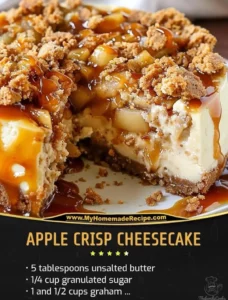
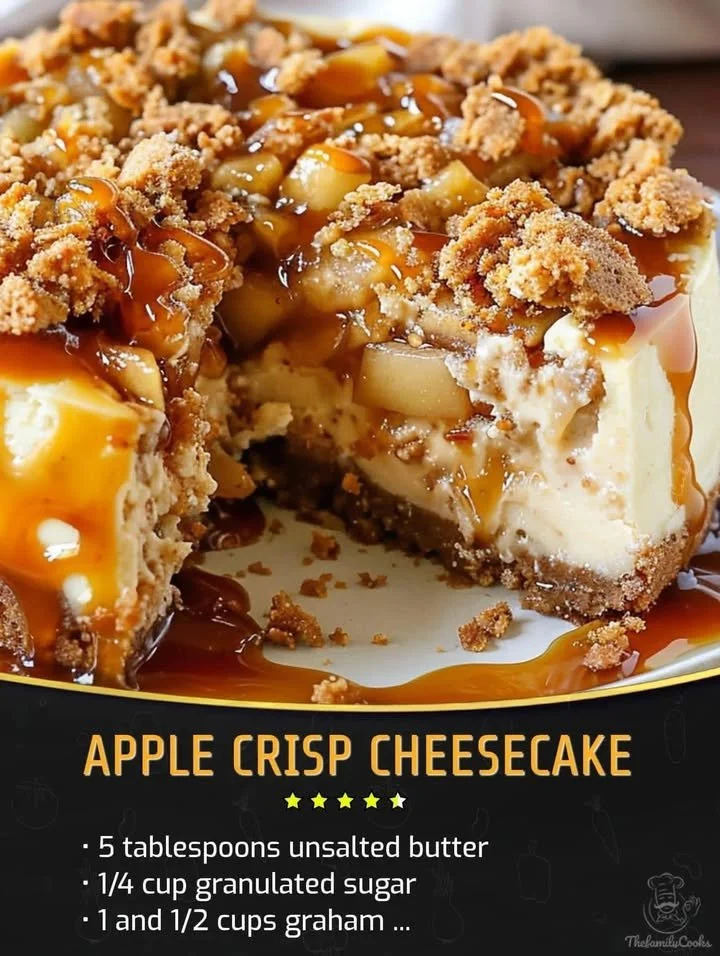
Now you can enjoy the creamy and crunchy goodness of your Apple Crisp Cheesecake!
Serving suggestions
To elevate your Apple Crisp Cheesecake experience, consider these serving tips! A dollop of whipped cream on top not only adds a creamy contrast but also enhances the visual appeal. You could also serve it alongside a scoop of vanilla ice cream for a classic touch. For a festive twist, sprinkle some cinnamon on top or drizzle with caramel sauce. Pair it with a cup of warm apple cider, and you’ve created a perfect autumn dessert!
Storage and reheating tips
To keep your Apple Crisp Cheesecake fresh, store any leftovers in an airtight container in the refrigerator. It’s best enjoyed within 3-5 days, although you might find it disappears much quicker! If you want to preserve it for longer, you can freeze individual slices wrapped tightly in plastic wrap. Just remember to let it thaw overnight in the fridge before serving.
Helpful cooking tips
For an even better outcome, here are some pro tips to consider:
- Make sure your cream cheese is softened to room temperature before mixing; this ensures a smooth filling.
- Let the cheesecake cool completely before releasing it from the springform pan. This prevents cracks and maintains its lovely shape.
- If you prefer a spicier flavor, you can add a pinch of nutmeg or cloves to the filling mix.
Creative twists
Want to add a personal touch to your Apple Crisp Cheesecake? Here are some fun variations to try:
- Swap the apple pie filling for pear or cherry filling for a different fruity flavor.
- Experiment with flavored cream cheese, like cinnamon or pumpkin spice, to enhance the autumnal vibes.
- For a healthier version, use granola in place of the crushed oatmeal cookies for an added crunch and nutritional boost.
Your questions answered
How long does it take to prepare?
The total time for prep and baking is approximately 1 hour and 15 minutes, though you’ll want to let it cool for at least 30 minutes before slicing.
Can I use different types of apples?
Absolutely! If you’re making homemade apple pie filling, try using a mix of sweet and tart apples for added depth of flavor.
How do I know when my cheesecake is done baking?
The cheesecake should be set in the center but slightly jiggly. It will continue to firm up as it cools.
Dive into this delicious recipe, and let your taste buds rejoice in the decadent flavors of Apple Crisp Cheesecake! Enjoy baking and indulging in this sweet sensation.