
Step-by-step instructions
Prepare the Pudding Base: In a medium bowl, whisk together the cold milk and instant vanilla pudding mix for about 2 minutes until it’s thickened. Let it sit aside to firm up slightly.
Make the Whipped Cream: In a separate bowl, beat the heavy whipping cream with powdered sugar and vanilla extract until stiff peaks form. This will add lightness and richness to your cups.
Combine Pudding and Cream: Gently fold half or all of the whipped cream into the prepared pudding. The goal here is to keep it fluffy, so fold carefully!
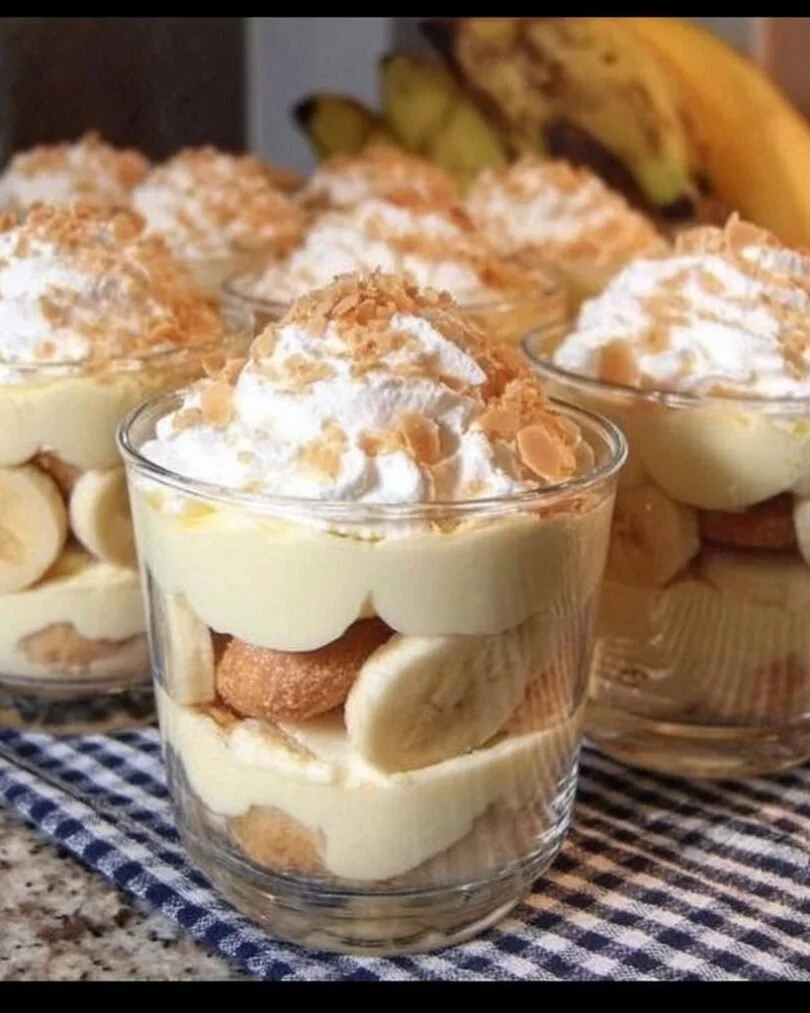
Assemble the Cups: In clear dessert cups or jars, start with a layer of vanilla wafers at the bottom. Follow with a layer of banana slices, then a generous spoonful of the pudding mixture. Repeat until the cups are filled, finishing with pudding on top.
Chill Before Serving: Cover the cups and refrigerate them for at least 2 hours. This step is crucial as it allows the flavors to meld and the wafers to soften.
Best ways to enjoy it
These banana pudding cups are perfect on their own, but you can elevate your serving experience with a few creative touches! Consider garnishing each cup with a drizzle of chocolate sauce or a sprinkle of crushed nuts for added texture. A dollop of whipped cream on top along with a slice of banana can make for an attractive presentation. They pair beautifully with a robust cup of coffee or a scoop of vanilla ice cream on the side for those who enjoy a little extra indulgence.
Keeping leftovers fresh
If you find yourself with leftovers (which is rare!), store them in an airtight container in the refrigerator for up to 2 days. Avoid freezing as the texture of the pudding and bananas can change significantly. Always handle food safely and make sure to give your dessert a quick sniff before enjoying, especially if it’s been stored for a while.
Pro chef tips
- For best results, use ripe but firm bananas to prevent them from becoming mushy in the dessert.
- If you’re short on time, consider using store-bought whipped cream for an even quicker prep process.
- For a fun twist, experiment with different flavored puddings or add a touch of instant coffee to the pudding for a coffee-flavored dessert.
Creative twists
Get creative with this classic dessert! You could switch out the vanilla pudding for chocolate for a sumptuous chocolate banana pudding cup. Alternatively, consider adding a layer of crushed Oreo cookies or a dash of peanut butter to give the dessert a unique spin. For a healthier take, swap out the heavy cream for Greek yogurt or use sugar-free pudding mix.
Frequently Asked Questions
How long does it take to prepare banana pudding cups?
Preparation for banana pudding cups typically takes around 30 minutes, but don’t forget to allow for the chilling time of at least 2 hours before serving.
Can I substitute something for the heavy cream?
Absolutely! You can use coconut cream or a dairy-free whipped topping for a lighter version that still tastes delicious.
What’s the best way to store leftovers?
Store any leftovers in an airtight container in the fridge for up to 2 days. It’s not recommended to freeze banana pudding due to the texture changes in bananas and cream.
Feel free to enjoy this delightful dessert that everyone will love, and don’t be shy to experiment with it from time to time! Enjoy!

