Step-by-Step Instructions
Let’s get started! Here’s how to prepare your Biscoff Cookie Butter Mini Cheesecakes:
- Preheat the Oven: Begin by preheating your oven to 325°F (163°C).
- Prepare the Muffin Tin: Line a muffin tin with cupcake liners for easy serving and a clean presentation.
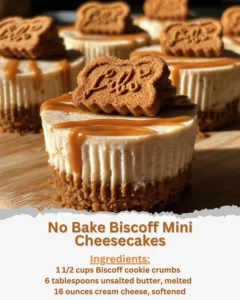
- Make the Crust: In a bowl, combine the Biscoff cookie crumbs with the melted butter. Mix well until the crumbs are fully coated, then press this mixture firmly into the bottom of each muffin liner.
- Bake the Crust: Place the tin in the oven and bake for 5 minutes. Once done, remove the tin and let it cool.
- Prepare the Filling: In a mixing bowl, beat together the softened cream cheese, granulated sugar, and vanilla extract until the mixture is nice and smooth. Next, add the sour cream, followed by the egg. Mix it until just combined—don’t overmix!
- Fill the Cups: Evenly distribute the filling over each crust in the muffin tin.
- Bake: Return the tin to the oven and bake for 15-18 minutes, or until the cheesecakes are set.
- Cool Time: Let them cool at room temperature before transferring them to the refrigerator. Chill for at least 3 hours to help them set further.
- Final Touch: Before serving, drizzle melted Biscoff cookie butter over each cheesecake and top with crushed Biscoff cookies for an extra crunch.
Best Ways to Enjoy It
When it comes to serving these delightful mini cheesecakes, the options are endless! Plate them individually, drizzle with a bit more melted Biscoff, or sprinkle some crushed cookies on top for a fabulous presentation. They pair beautifully with a side of fresh berries or a dollop of whipped cream for added flavor. Consider serving them at a brunch gathering, a dinner party, or even as a sweet treat for family movie nights.
Storage and Reheating Tips
Storing your Biscoff Cookie Butter Mini Cheesecakes is quite simple. Place any leftovers in an airtight container in the refrigerator, where they will stay fresh for about 3-5 days. If you would like to freeze them, wrap each cheesecake individually in plastic wrap and place them in a freezer-safe bag or container. They can last for up to a month in the freezer. Just remember to thaw them overnight in the refrigerator before serving.
Helpful Cooking Tips
To ensure your mini cheesecakes turn out great, here are some tips to keep in mind:
- Soften Your Cream Cheese: Make sure your cream cheese is at room temperature for easier mixing and a smoother texture.
- Don’t Overmix: Once you add the egg, mix just until combined to avoid adding too much air, which can cause cracks in your cheesecakes.
- Check for Doneness: The cheesecakes should be set but may still have a slight jiggle in the center once done. They will firm up as they cool in the refrigerator.
Creative Twists
Want to switch things up? Here are a few variations to consider:
- Different Nut Butters: Try using peanut butter or almond butter instead of Biscoff for a new flavor profile.
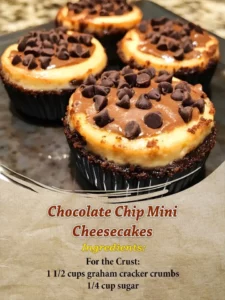
- Add Chocolate: Incorporate chocolate chips into the filling or drizzle some melted chocolate on top for a chocolate lover’s twist.
- Seasonal Toppings: In the fall, consider adding a sprinkle of cinnamon or nutmeg; in the summer, fresh fruit can add a bright touch.
FAQs
How long does it take to prepare and cook these cheesecakes?
The total time for preparation and baking comes to about 30-40 minutes, but remember to allow for an additional 3 hours of chilling before serving.
Can I substitute the Biscoff cookie butter?
Yes! You can use other cookie spreads, such as Nutella or even a homemade cookie butter, if you prefer.
Are these mini cheesecakes gluten-free?
They can be made gluten-free by using gluten-free Biscoff cookies or cookie crumbs. Always double-check labels to be sure!
How many mini cheesecakes does this recipe yield?
This recipe typically yields about 12 mini cheesecakes, perfect for sharing or enjoying multiple days!
With every bite of these Biscoff Cookie Butter Mini Cheesecakes, you’ll experience the perfect blend of creamy and crunchy, sweet and slightly spiced. Enjoy this delightful treat!