Cooking method
Step 1: Make the Pastry Cream
- In a medium saucepan, heat the whole milk over medium heat until it just begins to simmer. Then, remove it from heat.
- In a separate bowl, whisk together egg yolks, sugar, cornstarch, and a pinch of salt until the mixture is pale and smooth.
- Gradually pour the warm milk into the egg mixture while whisking constantly to tame the eggs. Then, return the mixture to the saucepan.
- Cook over medium heat, whisking continually until it thickens and starts to bubble (about 2-3 minutes). Remove from heat and stir in the butter and vanilla extract.
- Transfer the pastry cream to a bowl, press plastic wrap directly onto the surface, and refrigerate for at least 2 hours or until chilled.
Step 2: Make the Cupcakes
- Preheat your oven to 350°F (175°C) and line a muffin tin with 12 cupcake liners.
- In a medium bowl, whisk together flour, baking powder, baking soda, and salt.
- In a large mixing bowl, beat the softened butter and sugar until the mixture is light and fluffy. Then, add eggs one at a time, ensuring each is well incorporated.
- Mix in the vanilla extract. Alternate adding the dry ingredients with sour cream and milk, beginning and ending with the dry mixture.
- Divide the batter evenly into the cupcake liners, filling each about 3/4 full.
- Bake for 18-20 minutes or until a toothpick inserted comes out clean. Allow to cool in the pan for 5 minutes before transferring to a wire rack to cool completely.
Step 3: Fill the Cupcakes
- Once the cupcakes are completely cool, use a cupcake corer or a small knife to carefully remove the center (about halfway down).
- Fill each cupcake center with the chilled pastry cream using a spoon or piping bag.
Step 4: Make the Ganache
- Place the chocolate in a heatproof bowl. In a small saucepan, heat the heavy cream until just simmering.
- Pour the hot cream over the chocolate and let it sit for 2 minutes. Stir until smooth, and if desired, stir in butter for added shine.
- Allow the ganache to cool slightly.
Step 5: Top the Cupcakes
- Spoon or dip the tops of the filled cupcakes in the ganache.
- Let the ganache set at room temperature or refrigerate briefly for a firmer finish.
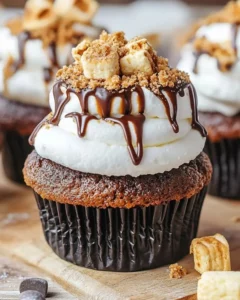
Best ways to enjoy it
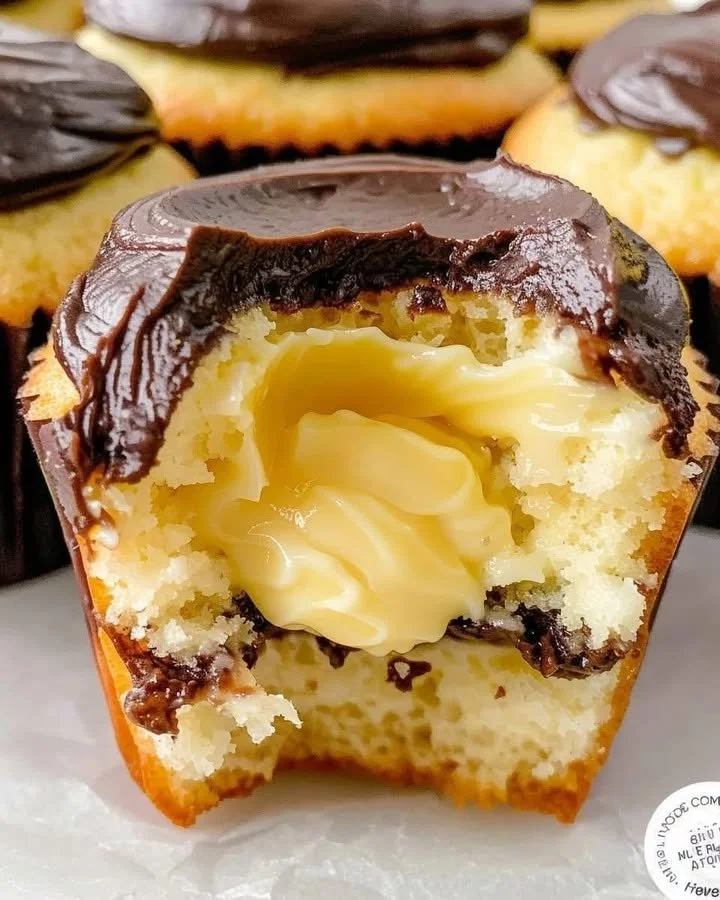
These Boston Cream Cupcakes are delightful on their own but also pair wonderfully with a fresh berry salad or a scoop of vanilla ice cream. For an even more festive touch, consider dusting the tops with powdered sugar or garnishing with chocolate shavings. They’re perfect for birthday celebrations, potlucks, or just a sweet treat during the week!
Storage and reheating tips
To maximize the freshness of your Boston Cream Cupcakes, store them in an airtight container in the refrigerator. They can be kept this way for up to 3 days. If you’d like to freeze them, simply wrap each cupcake tightly with plastic wrap and then foil to avoid freezer burn. They can be frozen for up to a month for later enjoyment. Just thaw them in the refrigerator before serving and reheat briefly in the microwave if desired.
Helpful cooking tips
- Make Ahead: Consider preparing the pastry cream a day in advance to save time.
- Cooling Time: Ensure cupcakes are completely cool before filling; warm cupcakes could melt the pastry cream.
- Instant Shine for Ganache: Adding a bit of butter to your ganache not only adds a beautiful sheen but also richness to the flavor.
Creative twists
- Flavor Variations: Experiment with different extracts like almond or lemon for a unique twist!
- Dietary Adjustments: For a dairy-free option, substitute the butter with a plant-based alternative and use non-dairy milk in the batter.
- Toppings: Try adding crushed nuts, sprinkles, or coconut on top of the ganache for added texture and flavor.
Your questions answered
How long does it take to make these cupcakes?
From start to finish, including chilling time for the pastry cream, expect to spend about 4-5 hours, but most of that is hands-off time.
Can I substitute the flour for a gluten-free option?
Yes! You can use a gluten-free all-purpose flour blend that contains xanthan gum. This will work well for maintaining the structure of your cupcakes.
How do I know when the cupcakes are done baking?
Insert a toothpick into the center of a cupcake. If it comes out clean or with just a few dry crumbs, your cupcakes are done baking.
By following these sections and tips, you’ll not only create stunning Boston Cream Cupcakes but also have a delightful experience along the way. Enjoy baking!