Butterfinger Pie is a delightful dessert that brings together rich flavors and creamy textures, making it a favorite for both family gatherings and casual evenings at home. This no-bake treat is incredibly simple to prepare, allowing you to whip up something special even on your busiest days. Just imagine a pie bursting with creamy goodness and the crunchy sweetness of Butterfinger candy bars—what’s not to love?
Recipe Information
Prep Time: 20 minutes
Cook Time: 0 minutes
Total Time: 4 hours 20 minutes (including chilling)
Servings: 8
Difficulty Level: Easy
Nutrition Information (per serving)
Calories: 310
Protein: 3g
Carbohydrates: 30g
Fat: 19g
Fiber: 1g
Sugar: 18g
Sodium: 150mg
Why Make Butterfinger Pie
Butterfinger Pie is a perfect choice for anyone who craves a sweet, indulgent dessert without spending hours in the kitchen. With its creamy filling and rich chocolate cookie crust, this pie offers a delicious finish to any meal or a sweet afternoon pick-me-up. Plus, its simplicity means that even novice bakers can create a crowd-pleaser that impresses family and friends alike. Whether you’re serving it at a birthday party or a holiday gathering, Butterfinger Pie is sure to become a cherished recipe you’ll turn to time and again.
How to Make Butterfinger Pie Step by Step
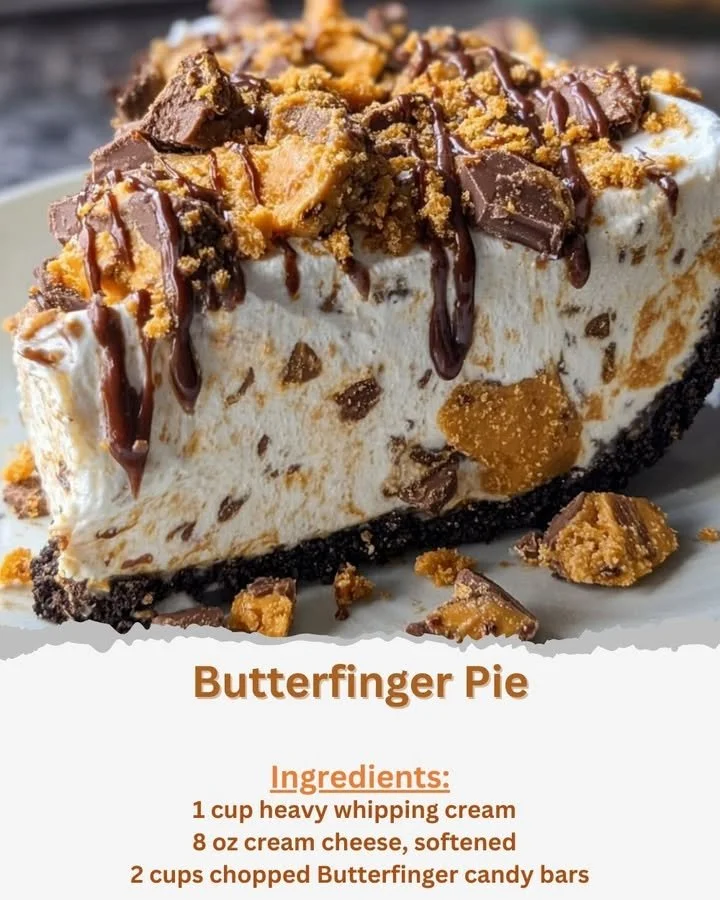
Ingredients
1 pre-made chocolate cookie crust (9-inch)
1 cup heavy whipping cream
8 oz cream cheese, softened
1 cup powdered sugar
1 teaspoon vanilla extract
2 cups chopped Butterfinger candy bars (about 4 regular size bars)
1/2 cup chocolate syrup, plus extra for drizzling
Directions
- In a large mixing bowl, whip the heavy whipping cream until stiff peaks form. Set aside.
- In another bowl, beat the softened cream cheese, powdered sugar, and vanilla extract until smooth and creamy.
- Gently fold the whipped cream into the cream cheese mixture until well combined.
- Fold in 1 1/2 cups of the chopped Butterfinger candy bars, reserving the rest for topping.
- Pour the mixture into the chocolate cookie crust and smooth the top with a spatula.
- Drizzle chocolate syrup over the top and sprinkle with the remaining chopped Butterfinger pieces.
- Refrigerate the pie for at least 4 hours, or overnight, to set properly before serving.
How to Serve Butterfinger Pie
Butterfinger Pie is best served chilled, making it the perfect dessert for warm weather gatherings. Pair it with a scoop of vanilla ice cream or fresh whipped cream for an extra touch of indulgence. For a balanced meal, consider serving it alongside a light salad or a refreshing fruit platter to cut through the richness of the pie.
How to Store Butterfinger Pie
You can store Butterfinger Pie in the fridge for up to 5 days. Just cover it tightly with plastic wrap or aluminum foil to keep it fresh. If you have leftovers, you can freeze them as well, although the texture may change slightly. To reheat, simply allow the pie to thaw in the refrigerator overnight before serving.
Expert Tips for Cooking Butterfinger Pie
- Make sure the cream cheese is at room temperature for easier mixing.
- Use a sturdy pre-made crust to hold the creamy filling without crumbling.
- For an even richer flavor, consider adding a pinch of salt to the whipped cream mixture.
- Feel free to adjust the sweetness by adding more or less powdered sugar according to your taste.
- Top with additional toppings like chopped nuts or a drizzle of caramel for a special touch.
Delicious Variations of Butterfinger Pie
- Add a layer of crushed Oreo cookies at the bottom for an extra crunch.
- Mix in a dash of peanut butter to the filling for a peanut butter Butterfinger Pie.
- Substitute chopped Reese’s Peanut Butter Cups for a chocolate and peanut butter twist.
Butterfinger Pie is sure to delight your taste buds with its creamy, crunchy, and chocolatey goodness. It’s easy to make and perfect for anyone who loves a sweet treat. Give it a try, and you may find yourself making this dessert again and again!