Step-by-step instructions
- In a bowl, whisk together the flour, baking powder, sugar, and salt.
- In another bowl, whisk together the milk, egg, melted butter, and optional vanilla extract until well blended.
- Pour the wet ingredients into the dry ingredients, and stir gently just until combined— don’t overmix; it’s okay if there are a few lumps!
- Preheat a buttered skillet over medium heat.
- For each waffle, pour about 1/4 cup of batter onto the skillet. Cook until bubbles form on top— this means it’s ready to flip.
- Flip the waffle and cook for another 1-2 minutes until golden brown.
- Cook the waffles according to your waffle iron’s instructions until they’re perfectly golden.
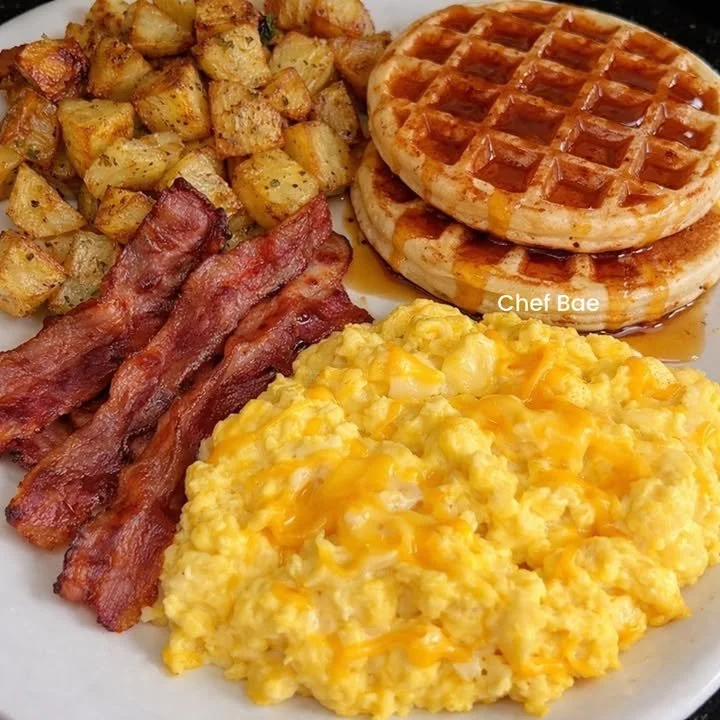
- Serve the waffles hot, stacked high.
- Drizzle generously with maple syrup.
Best ways to enjoy it
These buttermilk waffles shine on their own but can be easily elevated with a few creative touches:
- Top with fresh fruit such as strawberries, blueberries, or banana slices.
- Add a dollop of whipped cream or a scoop of ice cream for a dessert twist.
- Pair them with crispy bacon or sausage links for a savory contrast.
- Experiment with flavored syrups— vanilla, pecan, or caramel for a delicious break from the norm.
How to store
If you find yourself with leftovers (though unlikely!), store them in an airtight container in the refrigerator for up to 2 days. To reheat, simply pop them in the toaster for a quick and crispy revival. You can also make a larger batch and freeze individual waffles. Just wrap each one in plastic wrap and store them in a freezer bag. They’ll keep for about a month! Just toast directly from frozen when you’re ready to enjoy.
Helpful cooking tips
To ensure your buttermilk waffles turn out perfectly each time, here are a few handy tips:
- Make sure your baking powder is fresh— it should create a strong rise for light, fluffy waffles.
- Allow your batter to rest for about 5 minutes before cooking; this helps to create a tender texture.
- Don’t overmix! Gently folding until just combined is key to maintaining a fluffy outcome.
- Experiment with different toppings and syrups to keep your breakfast exciting!
Creative twists
If you’re looking to mix things up, consider trying the following variations:
- Add chocolate chips or blueberries directly into the batter before cooking for flavorful surprises.
- Swap out the all-purpose flour for whole wheat flour for added nutrition and a rustic flavor.
- For an extra touch, sprinkle cinnamon or nutmeg into the dry ingredients for a warm spice flavor.
- Try savory waffles by adding grated cheese, herbs, or cooked bacon to the batter!
Common questions
What is the prep time for buttermilk waffles?
Prep time for these waffles is about 10 minutes, with an additional cooking time of 20 minutes, depending on your iron.
Can I substitute the all-purpose flour?
Yes, you can use whole wheat flour or a gluten-free flour blend, but be aware it might alter the texture.
How long do leftovers stay good?
Leftovers can be stored in the refrigerator for up to 2 days and frozen for up to a month, making them easy to reheat.
Are there any recommended toppings?
Definitely! Maple syrup is classic, but you can use fresh fruits, whipped cream, and even yogurt for a delicious twist.
Creating these buttermilk waffles at home not only fills your kitchen with delightful aromas but also brings the joy of a classic breakfast to your table that everyone will love. So grab your ingredients, and get ready for a delicious waffle experience!