Step-by-step instructions
Follow these simple steps to create your cookie dough bars effortlessly:
- Prepare the dish: Line an 8 x 8 baking dish with parchment paper and spray it lightly with cooking spray. Set it aside.
- Cream the mixture: In a large bowl, beat softened butter and brown sugar with a hand mixer until the mixture is light and fluffy. Then add the vanilla extract and beat for another minute.
- Combine ingredients: Gradually add baked flour and sweetened condensed milk, alternating between them while mixing on low speed, until a soft dough forms.
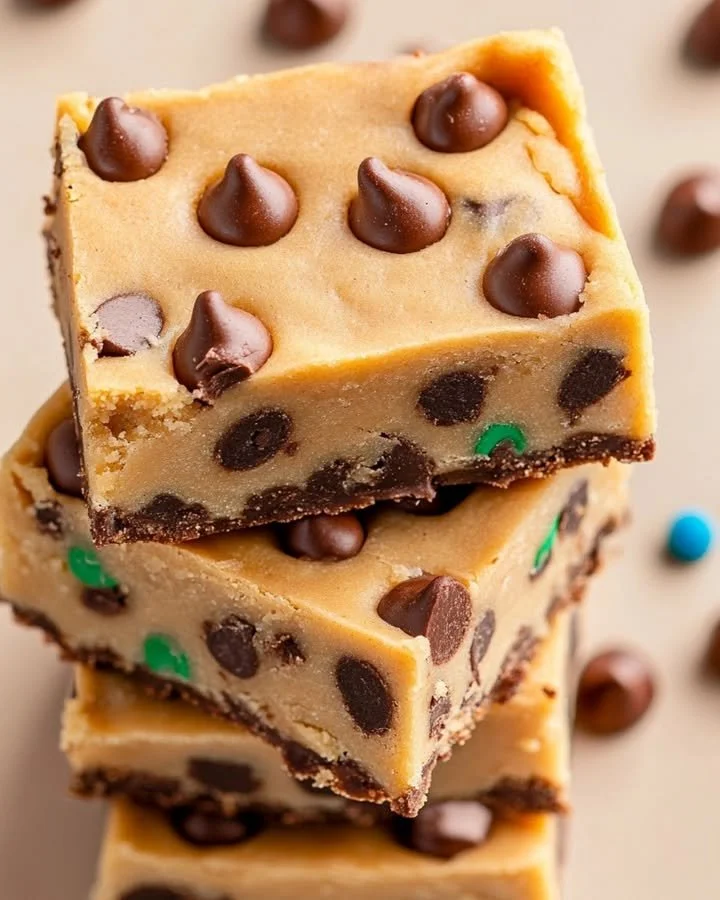
- Incorporate mix-ins: Use a spatula to gently fold in miniature chocolate chips and M&Ms into the dough. Spread everything evenly into your prepared baking dish.
- Freeze the mixture: Place the dish in the freezer for about 30 minutes to firm up the dough while you prepare the topping.
- Make the topping: In a small bowl, combine the semi-sweet chocolate chips and butter. Microwave for 30 seconds, stir, and repeat until the mixture is smooth.
- Top and chill: Pour the melted chocolate over the chilled cookie dough and spread it evenly. Sprinkle remaining M&Ms on top and gently press them into the chocolate.
- Refrigerate: Chill for 2 to 3 hours until firm. Once ready, lift out of the pan using the parchment paper, cut into bars, and enjoy!
Best ways to enjoy it
These cookie dough bars are best served chilled and can be enjoyed as-is or paired with your favorite summer dessert. Consider serving with a scoop of vanilla ice cream or drizzling with caramel sauce; both elevate the flavors to a whole new level. Present them on a colorful plate, maybe with some fresh berries or nuts for added texture.
Keeping leftovers fresh
To maintain the deliciousness of your cookie dough bars, store them in an airtight container in the refrigerator. They can last about a week, though I promise they won’t last that long once you’ve shared them! For longer storage, you can also freeze the bars in a sealed container; just make sure to layer parchment paper between each bar to prevent sticking.
Tricks for success
- Use room temperature butter: This helps in achieving that light and fluffy texture when creaming the butter and sugar.
- Baking the flour: This step is crucial for food safety, as it eliminates any potential bacteria in raw flour.
- Let them chill: For the best texture, don’t skip the chilling step! It helps set the bars for easy cutting and enhances the flavors.
Creative twists
Feel free to put your own spin on these cookie dough bars! Swap in different toppings like pretzel bits for a salty-sweet combo, or try adding different flavored chips, such as peanut butter or butterscotch. You can even experiment with nuts or dried fruits for added crunch and flavor.
Common questions
What is the prep time for these cookie dough bars?
The prep time is roughly 20 minutes, but do account for the chilling time required later.
Can I use gluten-free flour?
Absolutely! You can substitute all-purpose flour with a 1:1 gluten-free blend, and the bars will still be delicious.
How long do these cookie dough bars last?
When stored correctly in the refrigerator, these bars will last about a week. For longer storage, you may freeze them for up to three months.
Are these safe to eat?
Yes! Since this recipe includes baked flour, the bars are safe to eat. Just make sure to cool the flour before adding it to the mixture.
These cookie dough bars are sure to become a staple in your home, whether for a special occasion or simply treating yourself! Dive in, and enjoy every bite.