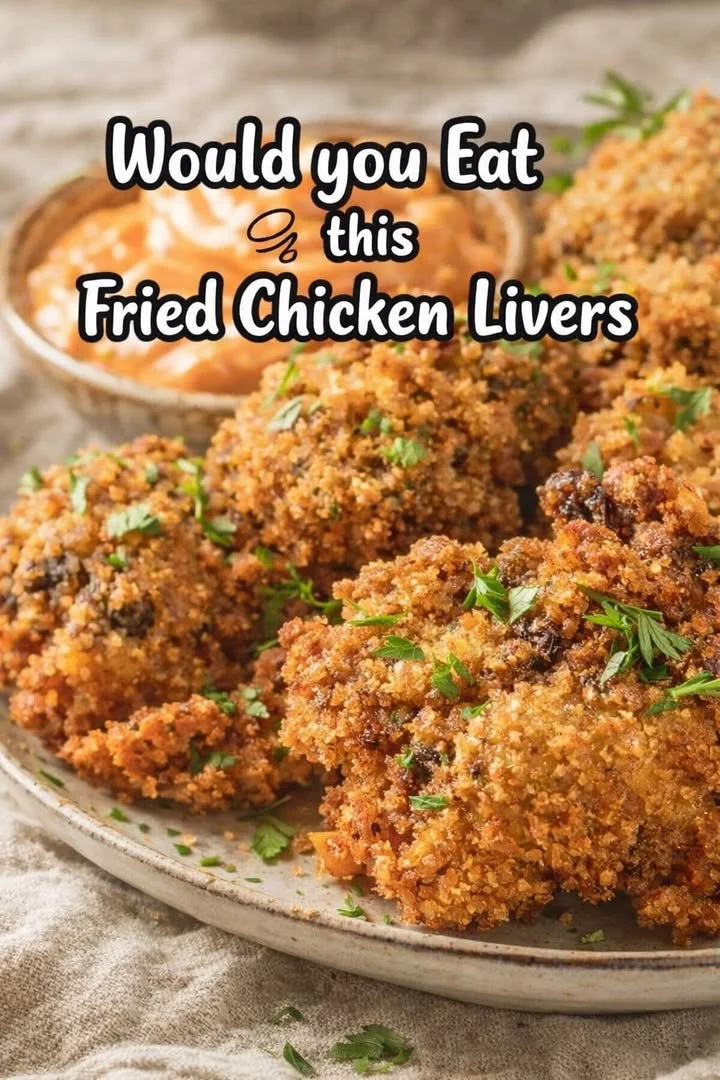
Step-by-step instructions
Soak the Livers: Start by soaking the chicken livers in buttermilk for at least 30 minutes. This tenderizes the livers and helps draw out any bitterness.
Prepare the Coating: In a large mixing bowl, combine flour, cornmeal, salt, pepper, paprika, garlic powder, and optional cayenne. Mix thoroughly to ensure even seasoning.
Dredge the Livers: After soaking, remove the livers from the buttermilk, letting the excess drip off. Dredge each liver in the seasoned flour mixture, making sure they are well coated.
Heat the Oil: In a frying pan, heat about 1 inch of oil to 350°F (175°C). You can use a thermometer for accuracy or test the oil by dropping in a small amount of the flour mixture; see if it sizzles.
Fry the Livers: Fry the livers in batches to avoid overcrowding. Cook for 3-4 minutes on each side until they are golden brown and crispy.
Drain and Serve: Remove the fried livers from the pan and let them drain on paper towels. Sprinkle with extra salt while hot, and serve immediately with a dipping sauce of your choice!
Best ways to enjoy it
Fried Chicken Livers make a fantastic appetizer, but they can also shine as a main dish. Consider serving them alongside creamy mashed potatoes, coleslaw, or a simple green salad. For a twist, offer dips like ranch dressing, spicy aioli, or even a drizzle of hot sauce for those who crave heat.
Keeping leftovers fresh
If you happen to have any leftovers (though they’re hard to resist), be sure to store them properly. Place the cooled chicken livers in an airtight container and refrigerate them. They should last about 2-3 days. When you’re ready to eat them again, reheat them in an oven for crispy results instead of the microwave.
Pro chef tips
Here are a few tips to ensure your Fried Chicken Livers come out perfectly:
- Don’t skip the soaking: This step is crucial for removing the livers’ natural bitterness and enhancing their tenderness.
- Use a meat thermometer: Maintaining the right oil temperature is key for crispy, golden results. If the oil is too cool, the batter will absorb more oil, becoming greasy.
- Stay lean on the dredge: While you want nice coverage, avoid clumping the flour mixture on the livers. A light coating creates a better texture.
Creative twists
Want to shake things up? Try some variations such as:
- Herbed Coating: Add fresh herbs like thyme or rosemary to the flour mixture for an aromatic punch.
- Spicy Flour: For those who crave an extra kick, increase the cayenne or add hot sauce directly to the buttermilk soak.
- Different Flours: Swap out half the all-purpose flour for a gluten-free blend or try using chickpea flour for a unique texture.
FAQs
How long does it take to prep and cook these livers?
The entire process takes about 1 hour, including marinating and frying time.
Can I freeze Fried Chicken Livers?
Absolutely! Allow them to cool completely before placing them in an airtight container or freezer bag. They can be frozen for up to a month.
What can I substitute for buttermilk?
If you don’t have buttermilk on hand, you can easily make a substitute by mixing 1 tablespoon of vinegar or lemon juice with 1 cup of milk and letting it sit for a few minutes.
By creating these crispy, decadent Fried Chicken Livers at home, you’re not just making dinner; you’re culinary magic with a dash of nostalgia and plenty of flavor. Enjoy every bite!