Step-by-Step Instructions
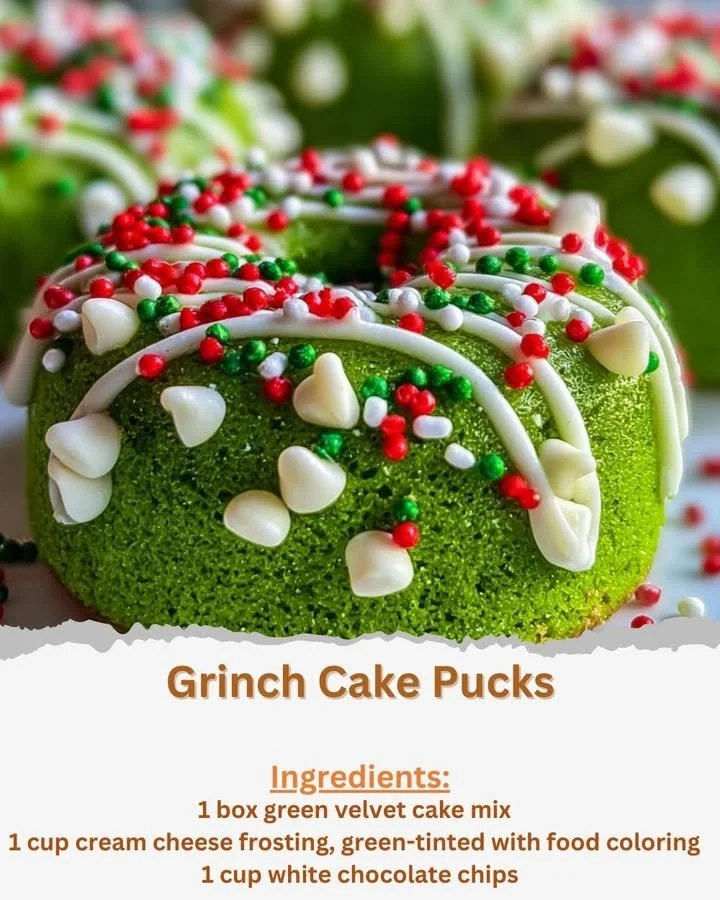
Here’s how to create these festive Grinch Cake Pucks:
- Preheat the Oven: Begin by preheating your oven to 350°F (175°C) and grease your muffin tin to prevent sticking.
- Prepare the Batter: Make the green velvet cake batter according to the instructions on the box. For that extra festive green, consider adding a bit more green food coloring to achieve a brighter hue.
- Fill the Muffin Tin: Pour the prepared batter evenly into each muffin cup, filling them about two-thirds full.
- Bake: Place the muffin tin in the oven and bake for 18-22 minutes. Check for doneness by inserting a toothpick in the center— it should come out clean when they’re done!
- Cooling Time: Allow your mini cakes to cool completely before carefully removing them from the tin.
- Creating the Cavity: Using a small knife, hollow out the center of each cake puck to create a shallow cavity that will hold the cream cheese frosting.
- Fill with Frosting: Add a delicious dollop of the green cream cheese frosting into each hollowed-out cake.
- Add the Finishing Touches: Top each cake puck with white chocolate chips to mimic ‘Grinch fur’ and sprinkle generously with the festive red and white sprinkles.
- Set in the Fridge: For the frosting to set perfectly, refrigerate the cakes for about 30 minutes before serving.
Best Ways to Enjoy It
These Grinch Cake Pucks are delightful on their own, but there are creative ways to elevate your serving game! Consider pairing them with a fun peppermint hot cocoa or displaying them on a festive cake stand surrounded by holiday decorations. You could even use small candy canes as festive garnishes for each plate.
Keeping Leftovers Fresh
Storing your Grinch Cake Pucks is quite simple! Keep them in an airtight container in the fridge, where they should stay fresh for up to a week. If you want to freeze them, wrap them tightly in plastic wrap before placing them in a freezer-safe container. They can be frozen for up to three months, but be mindful that the texture may change upon thawing.
Extra Advice for Success
- For an even brighter green color, don’t hesitate to add more food coloring beyond what’s specified.
- Use a serrated knife to hollow out the cakes neatly—this gives a cleaner finish for filling.
- If you’re in a rush, store-bought frosting works perfectly fine and can be tinted quickly!
Creative Twists on the Original
While the traditional recipe is a hit, you can easily personalize it. Consider using a red velvet cake mix instead for a fun twist, or switch to different kinds of frosting like vanilla or chocolate. You could also experiment with various decorations, such as edible glitter or seasonal candies, to make each batch uniquely yours!
FAQs
What is the prep time for Grinch Cake Pucks?
The total preparation time is about 30 minutes, with the baking process taking an additional 18-22 minutes. Allow extra time for cooling and refrigeration.
Can I use another cake flavor instead of green velvet?
Absolutely! You can substitute with red velvet, chocolate, or any flavor you prefer. Just make sure the colors coordinate with your theme!
How do I store leftovers safely?
Store any uneaten cake pucks in an airtight container in the fridge for up to a week. For longer storage, you can wrap them well and freeze them for up to three months.
Enjoy making these Grinch Cake Pucks and make your holiday celebrations even more memorable!