Step-by-step instructions
- In a bowl, combine warm water, sugar, and yeast. Allow it to sit for about 10 minutes until it becomes frothy.
- In a large mixing bowl, mix together the flour and salt. Then, add the frothy yeast mixture, minced garlic, and melted butter, stirring until the dough begins to form.
- Knead the dough on a floured surface for about 10 minutes or until it feels smooth and elastic.
- Place the dough in a greased bowl, cover it with a cloth, and let it rise in a warm place for about 1 hour, or until doubled in size.
- Preheat your oven to 180°C (350°F).
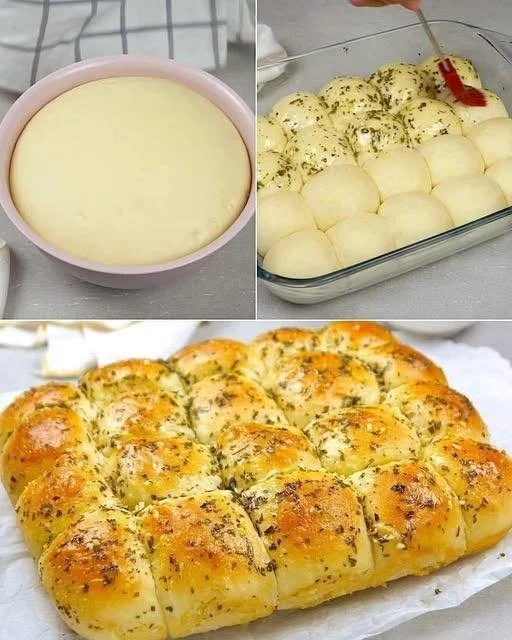
- Once risen, gently punch down the dough and divide it into small balls. Arrange these on a baking tray lined with parchment paper.
- Bake for 15-20 minutes until they are golden brown.
- Once out of the oven, brush them with melted butter and sprinkle with chopped parsley before serving.
Best ways to enjoy it
Serving your homemade garlic buns can be a fun and creative endeavor! Try placing them in a basket lined with a colorful cloth for a rustic touch. They pair wonderfully with a steaming bowl of tomato soup or a fresh green salad. If you want to make your meal more substantial, serve them alongside a hearty stew or pasta dish. They also make a perfect snack on their own!
Storage and reheating tips
To keep your leftover garlic buns fresh, store them in an airtight container at room temperature. They’ll stay delicious for about 2-3 days. If you want to keep them longer, consider freezing them. Just wrap each bun in plastic wrap and place them in a zip-lock freezer bag. When you’re ready to enjoy, reheat them in the oven at 180°C (350°F) for about 10 minutes, and they’ll be as good as freshly baked!
Helpful cooking tips
- Make sure your water is warm but not hot when activating the yeast; temperatures over 120°F can kill the yeast.
- If you want to add extra flavor, consider mixing herbs into the dough, such as rosemary or oregano.
- Experiment with different toppings for variation—try sprinkling cheese over the buns before baking for a cheesy garlic delight!
Creative twists
Feel free to get creative with this basic recipe! Consider incorporating grated cheese or roasted garlic into the dough for a richer flavor. For a sweeter option, why not mix in some herbs like dill or pesto? You could even try adding spices like paprika or chili flakes for a kick!
FAQs
How long does it take to make homemade garlic buns?
The total time from preparation to baking is about 1.5 to 2 hours. This includes the rising time, which is essential for achieving the perfect fluffiness.
Can I use whole wheat flour instead of all-purpose flour?
Absolutely! Whole wheat flour can give a nuttier flavor, although you might want to adjust the water content slightly, as whole wheat absorbs more liquid.
How can I make these buns dairy-free?
Simply substitute the melted butter with an equal amount of coconut oil or a dairy-free margarine; the garlic flavor will still shine through beautifully!
Now you’re ready to bake up some of the most delectable homemade garlic buns! Happy baking!