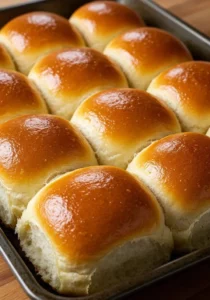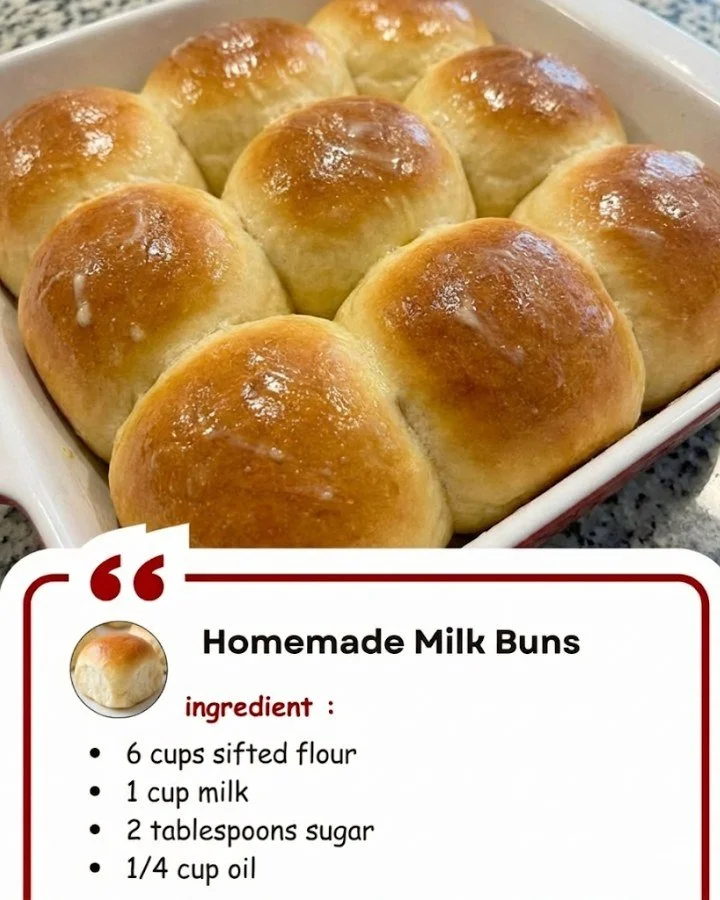
Directions to follow
- In a bowl, combine lukewarm milk, water, sugar, and yeast. Stir gently and let it sit for about 10 minutes until frothy.
- Sift flour and salt into a separate large bowl.
- Whisk the oil and egg into the yeast mixture, then gradually add the flour until you achieve a sticky dough.
- Incorporate the butter and knead the dough for 15 to 20 minutes until it becomes smooth and elastic.
- Place the kneaded dough into an oiled bowl, cover it, and allow it to rise in a warm area for 45 minutes.
- Shape the dough into golf ball-sized rounds, arranging them in a greased baking dish.
- Cover the formed buns and let them rise for an additional 30 minutes.
- Brush the tops with an egg wash, then bake at 180°C (350°F) for about 20 minutes or until golden brown.
- Once out of the oven, brush with a little extra butter for that soft finish.
Best ways to enjoy it
These Homemade Milk Buns are highly versatile and can be enjoyed in myriad ways. Serve them warm alongside your favorite soup, or use them for tasty sliders filled with grilled chicken or veggies. For a sweet touch, try spreading a bit of butter and jam or filling them with homemade whipped cream and strawberries. They also make a fantastic addition to a breakfast spread when served with eggs and bacon!
Storage and reheating tips
To keep your Homemade Milk Buns fresh, store them in an airtight container at room temperature for up to 3 days. If you want them to last longer, they can be wrapped tightly in plastic wrap and frozen for up to 3 months. Just make sure to let them cool completely before freezing. When reheating, simple pop them in the oven for a few minutes or microwave them for a quick warm-up.
Helpful cooking tips
- Measure your flour correctly; too much can lead to dense buns. Spoon the flour into the measuring cup and level it off!
- Kneading is key. The more you knead, the better the texture of your buns. Don’t be afraid to get your hands a little dusty!
- If you have a stand mixer, use it to knead the dough to save time and effort.
Creative twists
Feel free to experiment with this recipe! Add herbs like rosemary or thyme to the dough for a savory touch. You can also experiment with different types of flour, such as whole wheat or spelt, which can add a unique flavor and texture. For a sweet variation, consider adding a cinnamon-sugar blend or chocolate chips!
FAQs
How long does it take to prepare these milk buns?
The total time for preparation and baking is around 2 hours, which includes rising time. Plan for about 1 hour and 15 minutes of active prep and baking.
Can I substitute the yeast?
You can use instant yeast if you prefer, but there is no need to activate it first. Simply mix it directly with the flour.
Are these buns suitable for freezing?
Absolutely! These buns freeze remarkably well. Just be sure to wrap them properly to avoid freezer burn, and they can last for up to 3 months.
With this easy-to-follow guide, you’ll be on your way to making delicious Homemade Milk Buns that will elevate any meal or snack time treat. Enjoy baking!