
Step-by-step instructions
Prepare the Fruits: Start by washing your strawberries and pineapple slices. Pat them dry completely, as any moisture will cause the candy mixture to seize.
Create the Candy Coating: In a medium saucepan, mix together the sugar, corn syrup, and water. Stir gently until combined. Heat the mixture over medium until the sugar has dissolved, then stop stirring. Let it heat until it reaches 300°F (the hard-crack stage) on a candy thermometer.
Dip the Fruits: Remove the saucepan from heat. Stir in the vanilla extract if you’d like to add a hint of flavor. Quickly dip each fruit slice into the candy mixture, ensuring each piece is well-coated. Since the candy hardens rapidly, move swiftly!
Cool and Harden: Place the coated fruit slices on a parchment-lined surface. Allow them to cool completely, so the candy can harden.
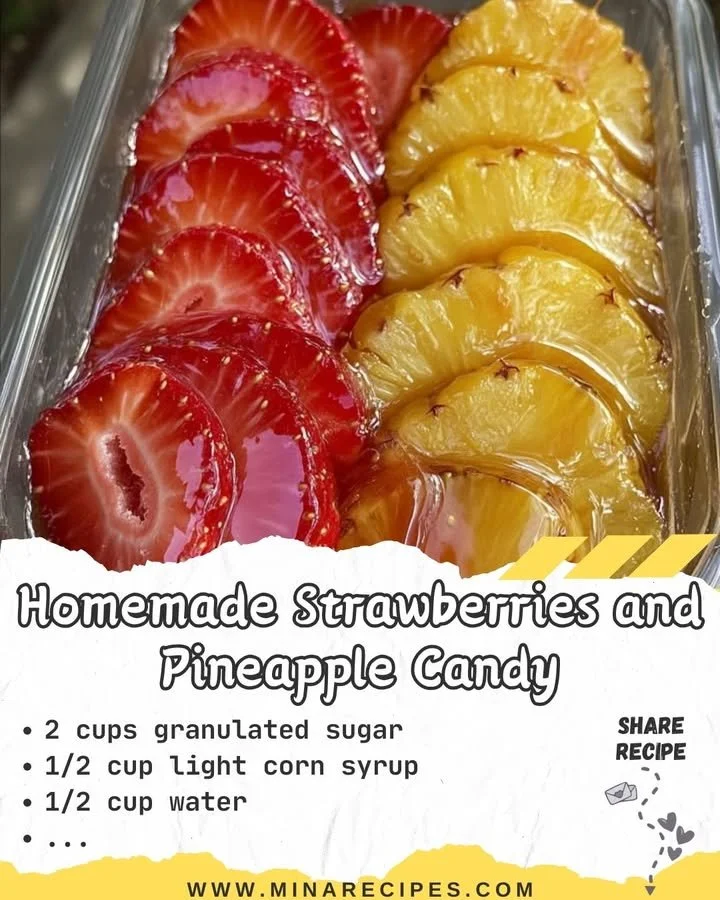
Serve and Enjoy: Once completely set, arrange your candy-coated strawberries and pineapple slices in a serving container. Enjoy right away for the best crunch or store them in an airtight container for up to one day at room temperature.
Serving suggestions
This candy can be enjoyed on its own, but you can also get creative! Try serving it with a dip, such as melted chocolate or a yogurt-based sauce. For a lovely presentation, set it on a platter topped with edible flowers. The vibrant colors of the candy fruit will surely catch everyone’s eye!
Keeping leftovers fresh
If you find yourself with any leftover candy (though it’s unlikely), you’ll want to store it properly. Keep the candy in an airtight container at room temperature for a maximum of one day. Due to the moisture how it can attract humidity, try to consume them as soon as possible for the best texture and flavor.
Helpful cooking tips
- Ensure dryness: Make sure your fruit is completely dry before dipping. A single drop of water can ruin the candy coating.
- Candy thermometer is a must: For the best results, use a candy thermometer. This ensures you achieve the hard-crack stage, resulting in that perfect crunch.
- Work quickly: Once the candy mixture is ready, you’re on a timer—move fast to coat the fruits before it hardens.
Creative twists
Feeling adventurous? Here are a few variations to experiment with:
- Different Fruits: Try using apple slices, citrus fruits, or even bananas for unique flavor profiles.
- Flavor Infusions: Experiment with flavored extracts—like almond or coconut—to give the candy a different twist.
- Chocolate Dip: Once your fruit is coated and set, you can dip it in melted chocolate for added decadence!
FAQs
What’s the prep time for this recipe?
Preparation takes around 15 minutes, while cooking is about 10-15 minutes depending on how quickly you reach the desired temperature.
Can I use frozen fruit for this recipe?
It’s best to use fresh fruit since frozen fruit can release moisture when thawed, harming the candy coating process.
How do I know when the candy is at the right temperature?
Using a candy thermometer is essential. The mixture should read 300°F for the perfect hard-crack stage.
Is it safe to store this candy?
Yes, as long as stored in an airtight container at room temperature. However, consume it within a day for the best quality.
Get ready to delight your family and friends with this easy, fun, and delicious homemade strawberries and pineapple candy!
