
Directions to Follow
Now, let’s dive into the easy steps for preparing this delicious treat!
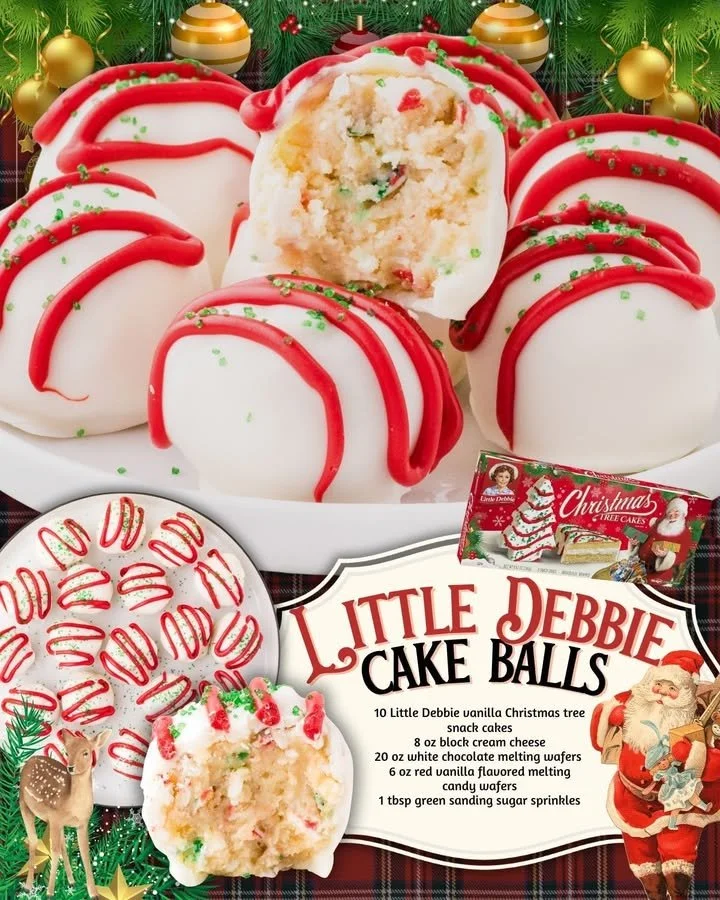
- Start by crushing the Little Debbie Christmas tree snack cakes in a large bowl. You can use a food processor or place them in a zip-top bag and crush them with a rolling pin.
- Add the cream cheese to the crushed cakes, mixing until everything is well blended and smooth.
- Roll the mixture into small, bite-sized balls and place them on a baking sheet.
- Put the balls in the freezer for about 30 minutes, or until they are firm to the touch.
- While the balls are freezing, melt the white chocolate melting wafers in a microwave or double boiler, following the instructions on the package.
- Once melted, dip each cake ball into the white chocolate coating evenly and return them to the baking sheet.
- Drizzle the melted red vanilla candy over each cake ball and sprinkle with the green sanding sugar for a festive look.
- Let them set until the chocolate hardens fully.
- Serve and enjoy your delightful holiday treat!
Best Ways to Enjoy It
Little Debbie Christmas Tree Cake Balls are perfect for various occasions! Serve them on a festive platter at your holiday gatherings, or package them in cute gift boxes as sweet treats for friends and family. Pair them with hot cocoa, spiced cider, or coffee for a cozy afternoon snack.
These cake balls are ideal for dessert tables or as a treat for a Christmas movie marathon. Their vibrant colors also make them visually appealing for any holiday celebration!
How to Store & Freeze
To keep your Little Debbie Christmas Tree Cake Balls fresh, store them in an airtight container at room temperature for 3-4 days. If you want to keep them for longer, you can refrigerate them for up to two weeks or freeze them for up to three months. Just make sure they’re well-wrapped to avoid freezer burn.
When you’re ready to enjoy your frozen cake balls, thaw them in the refrigerator for a few hours before serving to maintain their delightful texture!
Pro Chef Tips
To ensure your cake balls come out perfectly, consider these helpful tips:
- Ensure that your cream cheese is softened at room temperature for easy mixing.
- If the mixture is too sticky to handle, refrigerate it for a few minutes before rolling into balls.
- For a beautiful finish, use colored chocolate melting wafers to create a snowy effect or to match your holiday theme.
- For a burst of flavor, try adding some almond extract to the cream cheese mixture!
Creative Twists
If you’re feeling adventurous, try these fun variations for your cake balls:
- Swap in chocolate cake for a rich, chocolatey treat.
- Roll the balls in crushed candy canes or nuts for extra texture and flavor.
- Use dark chocolate melting wafers for a less sweet flavor profile.
- Incorporate different flavored cream cheeses, such as raspberry or caramel, to enhance the festive experience.
FAQs
How long does it typically take to prepare these cake balls?
Preparation time is around 20 minutes, but including freezing time, plan for a total of about 1 hour.
Can I use other flavors of Little Debbie snacks?
Absolutely! Feel free to experiment with other flavors to create unique cake balls that suit your taste.
How do I ensure the chocolate coating is smooth?
Make sure to thoroughly melt the white chocolate wafers and stir frequently to prevent clumping. A little bit of vegetable oil can help create a smoother consistency.
Now you’re ready to make these delightful Little Debbie Christmas Tree Cake Balls! Get in the kitchen and spread the holiday cheer with this simple yet scrumptious recipe. Happy baking!
