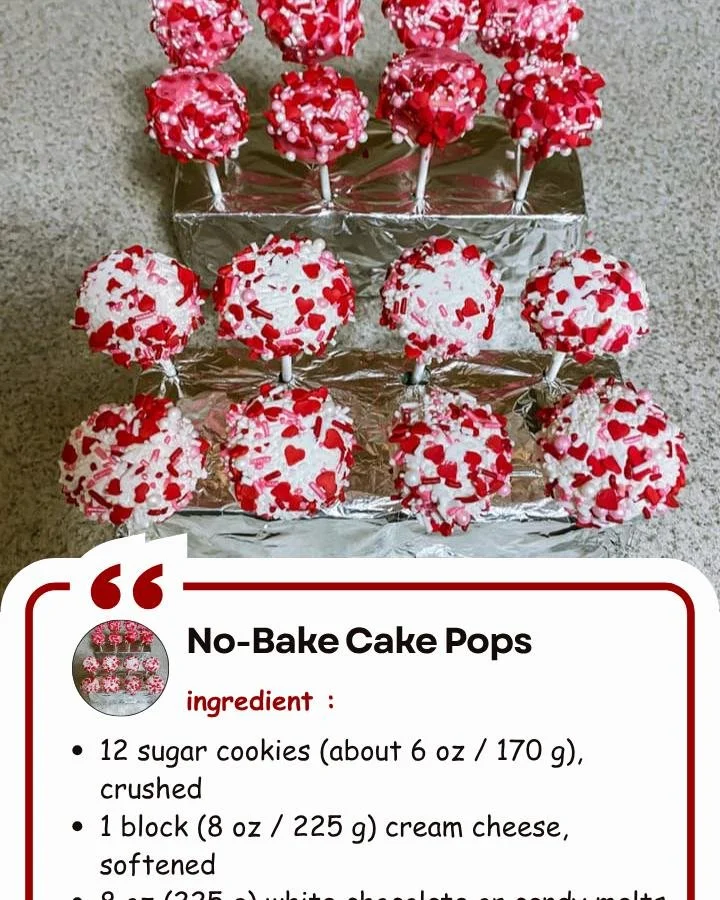
Step-by-step instructions
- Start by crumbling the sugar cookies into fine crumbs in a medium bowl.
- Add the softened cream cheese and mix until the mixture is fully blended and resembles a dough.
- Roll the mixture into small balls, about 1 inch (2.5 cm) wide.
- Insert a cake pop stick or straw into the center of each ball gently.
- Place the pops on a lined tray and refrigerate for 10–15 minutes to firm up.
- Meanwhile, melt the white chocolate or candy melts according to package instructions.
- Dip each cake pop into the melted chocolate, allowing any excess to drip off.
- Immediately add sprinkles before the coating sets for a colorful finish.
- Chill the cake pops again for about 10 minutes until the coating is firm.
Prep Time: 20 minutes | Chilling Time: 25 minutes | Total Time: 45 minutes.
Tips:
- For a unique spin, use flavored cookies.
- Store your cake pops in the refrigerator for up to 3 days. Serve them chilled for the best texture.
Best ways to enjoy it
These No-Bake Cake Pops make a delightful addition to any dessert table. Consider arranging them in a decorative mug or on a cake stand for parties. They pair wonderfully with a variety of beverages such as milk, coffee, or fruit punch. You can also serve them alongside fruit skewers for a balanced treat.
Keeping leftovers fresh
To ensure your cake pops stay as delicious as the day you made them, store them in an airtight container in the refrigerator. They are best enjoyed within three days; simply take them out to chill a bit before serving for optimal taste and texture. Be sure to handle them with care to avoid any damage to the coating.
Extra advice
- For an even creamier texture, consider adding a bit of vanilla extract to the cream cheese mixture.
- If you’re in a hurry, use pre-packaged cookie crumbs instead of crushing your own cookies.
- Don’t be afraid to get creative with your toppings—use mini chocolate chips, nuts, or edible glitter for festive flair!
Creative twists
There are numerous ways to personalize your cake pops. Try incorporating different flavored cookies, like ginger snap or peanut butter, to give each pop a unique taste. You could also swap out the white chocolate for milk or dark chocolate for another delicious coating. For those looking for a healthier option, consider using yogurt-covered raisins instead of sprinkles on top.
FAQs
How long do No-Bake Cake Pops last?
These treats can be stored in the refrigerator for up to three days. Just make sure they are in an airtight container to maintain their freshness.
Can I use flavored cream cheese?
Absolutely! Flavored cream cheese can add an exciting twist to your cake pops. Just ensure that the flavors complement the cookies you’re using.
What if I don’t have cake pop sticks?
If you don’t have cake pop sticks, you can use coffee stirrers or cut straws to create a fun, DIY presentation.
Enjoy making these delicious No-Bake Cake Pops that are sure to become a favorite in your household!