Step-by-step instructions
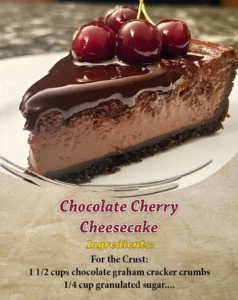
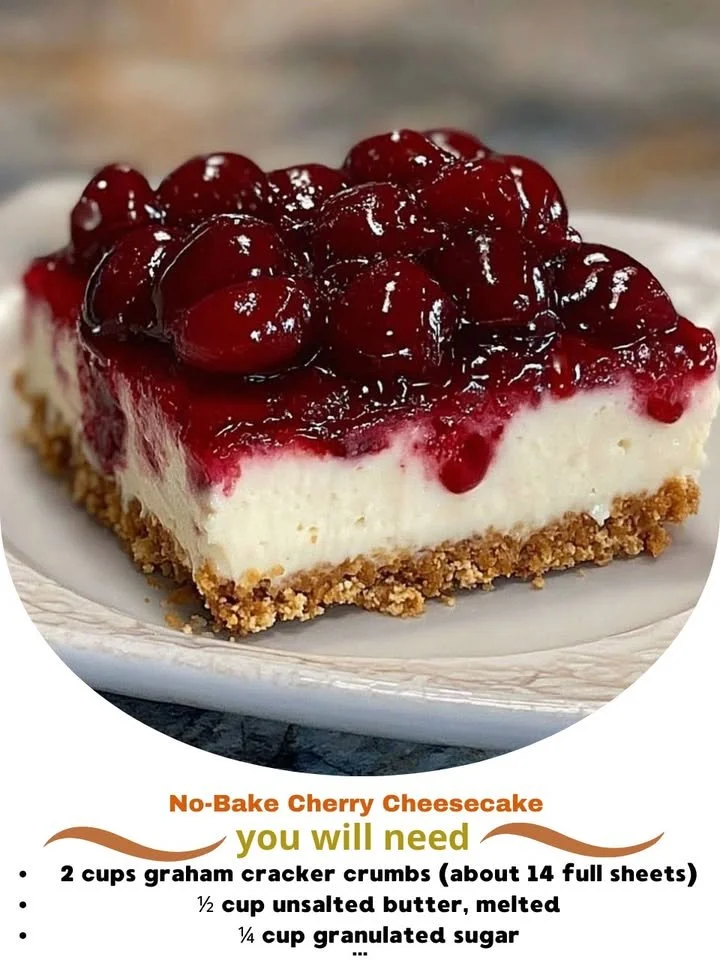
Prepare the crust. In a mixing bowl, combine graham cracker crumbs, melted butter, and granulated sugar. Mix until everything is well incorporated. Press this mixture firmly into the bottom of a springform pan to create a sturdy crust.
Make the filling. In another bowl, beat the softened cream cheese until smooth and creamy. Gradually add the powdered sugar and vanilla extract, mixing thoroughly until fully blended.
Whip the cream. In a separate bowl, whip the heavy cream until stiff peaks form. Gently fold this whipped cream into the cream cheese mixture until everything is combined without losing that airy texture.
Assemble. Pour the cream cheese filling over the prepared graham cracker crust. Spread it evenly with a spatula until it looks lovely and smooth.
Chill the cheesecake. Refrigerate the cheesecake for at least 4 hours or until it is set. This step is essential to achieve the perfect texture.
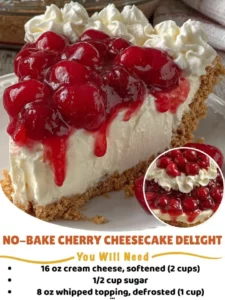
Add cherries. Once set, top your cheesecake with cherry pie filling right before serving for that iconic look and flavor.
Best ways to enjoy it
This No-Bake Cherry Cheesecake is a showstopper that can be served in a variety of ways. Slice it into generous pieces, and consider garnishing each slice with a dollop of whipped cream or a sprig of mint for that extra special touch. For an interactive dessert experience, serve it with fresh cherries or a drizzle of chocolate sauce on the side.
How to store
To keep your No-Bake Cherry Cheesecake fresh, store leftovers in the refrigerator. It’s best to cover it tightly with plastic wrap or store it in an airtight container. Enjoy it within 3-4 days for optimal taste. If you want to save it for longer, you can freeze individual slices, though it’s advisable to do so without the cherry topping. Thaw in the fridge for a quick dessert that’s just as delightful as the first day.
Helpful cooking tips
Room temperature cream cheese: Start with cream cheese that’s softened to room temperature. This will help create a smoother filling without lumps.
Don’t skip the chilling: Patience is key! Allowing your cheesecake to chill for the full four hours ensures it sets properly, making it easier to slice.
Double the recipe: If you’re expecting a crowd, consider doubling the ingredients for a larger cheesecake. Just remember to adjust the chilling time, as a thicker cheesecake may need a bit more time to set.
Creative twists
Feel free to experiment with this recipe! Swap out the cherry pie filling for other fruits like blueberries, strawberries, or even a berry medley. You can also infuse the cream cheese mixture with lemon zest for a citrusy kick or try using flavored graham crackers for a unique crust.

Common questions
How long does it take to prepare?
This No-Bake Cherry Cheesecake takes about 30 minutes to prepare, but remember to factor in at least 4 hours of chilling time for the best results.
Can I use different fruits for the topping?
Absolutely! This cheesecake works beautifully with various fruit toppings. Feel free to experiment with fresh fruits or other canned pie fillings.
Is it safe to leave it out?
Since this cheesecake contains cream cheese and heavy cream, it’s best to keep it refrigerated. Serve it at room temperature by taking it out just 10-15 minutes before serving, but avoid leaving it out for longer than 2 hours.
Enjoy crafting this No-Bake Cherry Cheesecake, and watch as it becomes a cherished favorite in your home!