Step-by-step instructions
Let’s dive into the cooking process! It’s essential to follow these steps carefully for a flawless pie:
- First, bake your pie crust according to package or recipe instructions. Once it’s golden and fragrant, set it aside to cool completely.
- In a medium saucepan, whisk together the cocoa powder, sugar, flour, and milk until smooth.
- Add the egg yolks and butter to the saucepan and cook over medium heat, stirring constantly. You want the mixture to thicken into a creamy filling — this usually takes about 5-7 minutes.
- Remove the pan from heat and stir in the vanilla extract. This is where the magic begins, as the aroma fills your kitchen.
- Pour the chocolate filling into the cooled pie crust. Look at that shine!
- In a clean mixing bowl, beat the egg whites and cream of tartar until soft peaks form. Gradually add the remaining sugar, beating until stiff peaks form.
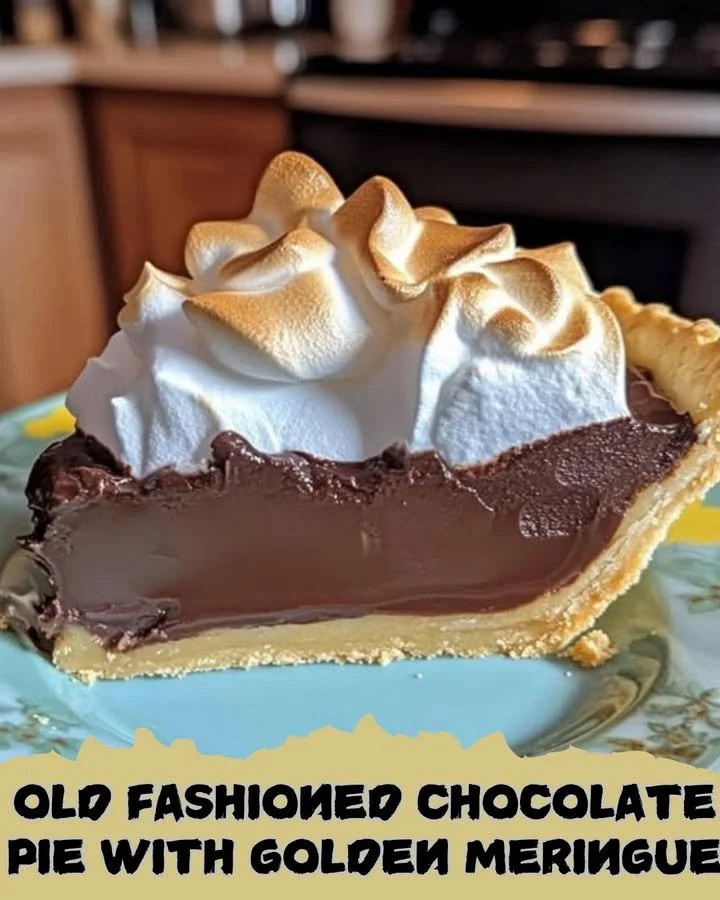
- Spoon the meringue over the chocolate filling, spreading it gently all the way to the crust edges, creating an impressive contrast.
- Bake at 350°F (175°C) for 10-15 minutes, or until the meringue is beautifully golden brown.
- Let the pie cool completely before serving. Patience is a virtue here!
Best ways to enjoy it
When it comes to serving, the beauty of this pie is versatile. Consider presenting it with a dollop of whipped cream or a scoop of vanilla ice cream on the side to elevate the dessert experience. You might also wish to sprinkle some chocolate shavings or toasted coconut on top for added texture and flavor.
Pair your pie with a hot cup of coffee or a light herbal tea — the contrasting flavors will make your meal truly memorable.
Keeping leftovers fresh
Wondering how to store your delightful creation? To keep your Old Fashioned Chocolate Pie fresh, cover it loosely with plastic wrap or aluminum foil — this protects the meringue from becoming too sticky while keeping the pie deliciously moist. Generally, it can be stored in the refrigerator for up to 3 days.
For longer storage, consider freezing individual slices. Just make sure to wrap them tightly in plastic wrap and then in foil. When ready to enjoy, let the slice thaw in the fridge for an overnight treat!
Helpful cooking tips
Here are some extra tips to ensure your pie turns out perfectly every time:
- Make sure your mixing bowls and utensils are completely dry when whipping egg whites to avoid any issues achieving stiff peaks.
- If your meringue starts to weep (produce moisture) after baking, it may be due to high humidity. Ensuring your ingredients are at room temperature can help.
- For an extra layer of flavor, try using high-quality cocoa powder; it can make a significant difference in the richness of your pie.
Creative twists
Feel free to explore different variations of this classic pie. You could introduce flavors by adding a couple of tablespoons of espresso powder to enhance the chocolate richness or try a hint of orange zest for a refreshing citrus twist. Thinking of dietary swaps? Use a gluten-free pie crust or vegan butter for a dairy-free version that still tastes indulgent.
Your questions answered
What is the prep time for this recipe?
The prep time for the Old Fashioned Chocolate Pie is about 15-20 minutes, with an additional baking time of around 10-15 minutes.
Can I substitute the dairy ingredients?
Absolutely! You can use almond milk or any plant-based milk for the chocolate filling, and vegan butter can replace regular butter in this recipe.
How should I store the pie for the best freshness?
Store the pie in the refrigerator, covered loosely to prevent the meringue from becoming sticky. Ensure to consume it within three days for optimal taste and freshness.
This recipe is not just about savoring each bite; it’s about creating a cherished tradition that can be shared across generations. Enjoy baking and indulging in this nostalgic treat!