Step-by-step instructions
Here’s how to bring your Oreo cheesecake to life:
Step 1: Prepare the Crust
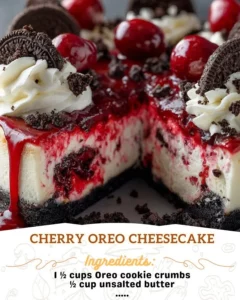
Preheat your oven to 325°F (165°C). In a medium bowl, combine Oreo cookie crumbs and melted butter until fully mixed. Press this mixture firmly into the bottom of a 9-inch springform pan. It’s important to bake it for about 8-10 minutes to create a sturdy crust. Allow it to cool afterward.
Step 2: Make the Cheesecake Filling
In a mixing bowl, beat together the softened cream cheese and granulated sugar until nice and smooth. Add in the vanilla extract and eggs one at a time, mixing well with each addition. Next, fold in the sour cream and heavy cream for an ultra-creamy texture, followed by the chopped Oreo cookies, which gives delightful bites throughout.
Step 3: Bake the Cheesecake
Pour the cheesecake batter onto the cooled crust and gently tap the pan on the counter to release any air bubbles. Bake in the preheated oven for 50-60 minutes, monitoring until the center is set but still somewhat jiggly. Afterward, let it cool in the oven for one hour, then transfer it to the fridge for at least 4 hours or overnight to set properly.
Step 4: Prepare the Topping
Once your cheesecake is chilled, it’s time to make it shine! Whip the heavy cream with powdered sugar until stiff peaks form. Spread this whipped cream over the top of your cheesecake generously, then drizzle with chocolate syrup and add whole Oreo cookies for that ultimate finish.
Step 5: Serve
Slice into this dreamy dessert and watch as it disappears! Enjoy it on its own or with a side of fresh berries for a refreshing contrast.
Best ways to enjoy it
To make your Oreo cheesecake presentation extra special, try dusting the top with cocoa powder or serving slices with a dollop of whipped cream. Pair it with a scoop of vanilla ice cream for those extra indulgent moments, or offer a side of fresh fruit such as strawberries or raspberries to balance the richness.
How to store & freeze
To keep any leftovers fresh (if there are any!), cover the cheesecake tightly with plastic wrap or place it in an airtight container. It will stay delicious in the fridge for up to 5 days. You can also freeze it for longer storage—just remember to wrap it well and label it. When you’re ready to enjoy, let it thaw in the refrigerator overnight.
Helpful cooking tips
- When mixing the cream cheese, make sure it’s at room temperature for a smooth filling.
- Avoid overmixing after adding the eggs, as this can create air bubbles that cause cracks during baking.
- If you prefer a slightly less sweet version, reduce the sugar in the filling or topping to your taste.
Creative twists
Feeling adventurous? Try adding different flavors or textures to your cheesecake. How about using mint Oreos for a refreshing twist? Or, drizzle some caramel on top for a sweet contrast. You can even mix in some peanut butter or swap out the whole cookies for gluten-free varieties to suit your guests’ dietary needs.
FAQs
What’s the prep time for this cheesecake?
The total prep time is around 30 minutes, with additional chilling and baking times.
Can I substitute cream cheese?
You can use Neufchâtel cheese for a lighter option, but keep in mind it will slightly alter the texture and flavor.
How long does it need to chill before serving?
It’s best to chill the cheesecake for at least 4 hours, although overnight is ideal for set perfection.
Now, roll up your sleeves and get ready to make a dessert that will surely impress everyone!