
Step-by-step instructions
Prepare the Filling: Start by heating olive oil in a skillet over medium heat. Add minced garlic and sauté for about one minute until fragrant. Then, toss in the chopped shrimp and cook until they turn pink, roughly 3-4 minutes. Incorporate the spinach and cook until just wilted, about 2 minutes. Transfer this mixture into a bowl to cool a bit before mixing in ricotta, mozzarella, Parmesan, and the beaten egg. Season generously with salt and pepper.
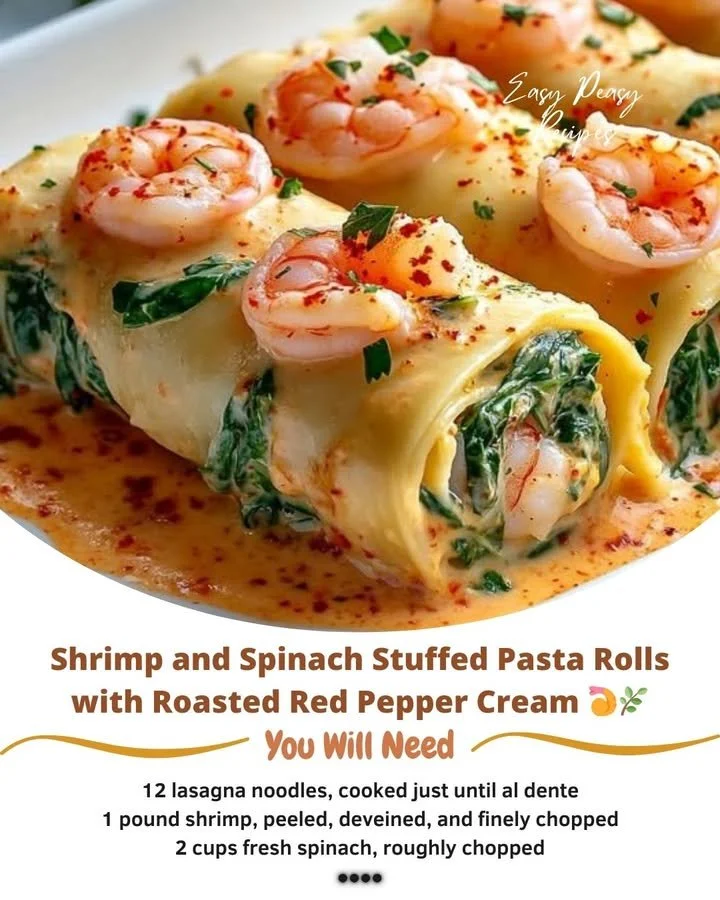
Roll the Pasta: On a clean surface, lay out your cooked lasagna noodles. Place a spoonful of the shrimp and spinach filling along one edge of each noodle. Roll them up tightly, placing the seam side down in a greased baking dish.
Make the Roasted Red Pepper Cream Sauce: In a saucepan, melt butter over medium heat. Add minced garlic and sauté for about a minute. Stir in the chopped roasted red peppers and let them cook for another 2 minutes. Pour in the heavy cream and bring the mixture to a simmer. Gradually whisk in the Parmesan cheese, allowing the sauce to thicken slightly, about 5 minutes. Season to taste.
Assemble and Bake: Pour the roasted red pepper cream sauce over the stuffed pasta rolls evenly. For added richness, sprinkle extra Parmesan cheese on top. Cover the baking dish with foil and bake in a preheated oven at 375°F (190°C) for 20 minutes. Remove the foil and bake for an additional 10 minutes or until the sauce is bubbling and the top is a golden brown.
Serve: Let the dish cool for a few minutes before serving. Garnish with freshly chopped basil or parsley for a pop of color. Pair with garlic bread or a crisp salad for a complete meal.
Best ways to enjoy it
When it comes to serving these pasta rolls, presentation matters! Arrange the stuffed rolls on a large platter, drizzled with any remaining roasted red pepper cream sauce, and add some chopped herbs for color. A side of garlic bread pairs perfectly with this dish, soaking up any extra sauce, while a fresh green salad provides a crunchy contrast that balances the richness of the pasta rolls.
Storage and reheating tips
If you happen to have leftovers (though they might be too delicious to resist!), allow the dish to cool completely before storing it in an airtight container in the fridge. It should last for about 3-4 days. Reheat in the oven at 350°F (175°C) for about 15-20 minutes or until warmed through. If you want to save them for later, these pasta rolls can also be frozen (before baking) by wrapping each roll tightly. They will keep for up to 2 months in the freezer. Just remember to thaw in the refrigerator and add extra baking time if cooking from frozen!
Helpful cooking tips
To enhance the flavors of your Shrimp and Spinach Stuffed Pasta Rolls, consider using wild-caught shrimp for a fresher taste and adding a pinch of red pepper flakes to the filling if you enjoy a bit of heat. Also, keep a close eye on the sauce while cooking; you want it to thicken but not reduce too much—cooking it gently allows the flavors to meld without overcooking.
Creative twists
Feel free to get creative! Substitute the shrimp with cooked chicken or a medley of vegetables for a vegetarian option. You can also experiment by adding spices like cayenne for a kick or fresh lemon zest in the filling to brighten the flavors. Think about topping your dish with crispy breadcrumbs for an added crunch before baking.
FAQ
What is the prep time for this recipe?
The total prep time is about 30-40 minutes, plus baking time.
Can I make this dish ahead of time?
Absolutely! You can prepare the rolls and sauce earlier in the day, keep them separate, and assemble and bake them just before serving.
What can I substitute for shrimp?
If shrimp isn’t your thing, try using diced cooked chicken or even sautéed mushrooms for a vegetarian twist.
Is it safe to freeze these stuffed pasta rolls?
Yes, they can be frozen before baking. Just ensure they are well-wrapped to prevent freezer burn, and thaw in the fridge before cooking.
Crafting Shrimp and Spinach Stuffed Pasta Rolls with Roasted Red Pepper Cream is not only a fulfilling cooking experience but also a guarantee that your dining table will be buzzing with grateful diners. Happy cooking!
