Directions to follow
Prepare the Filling
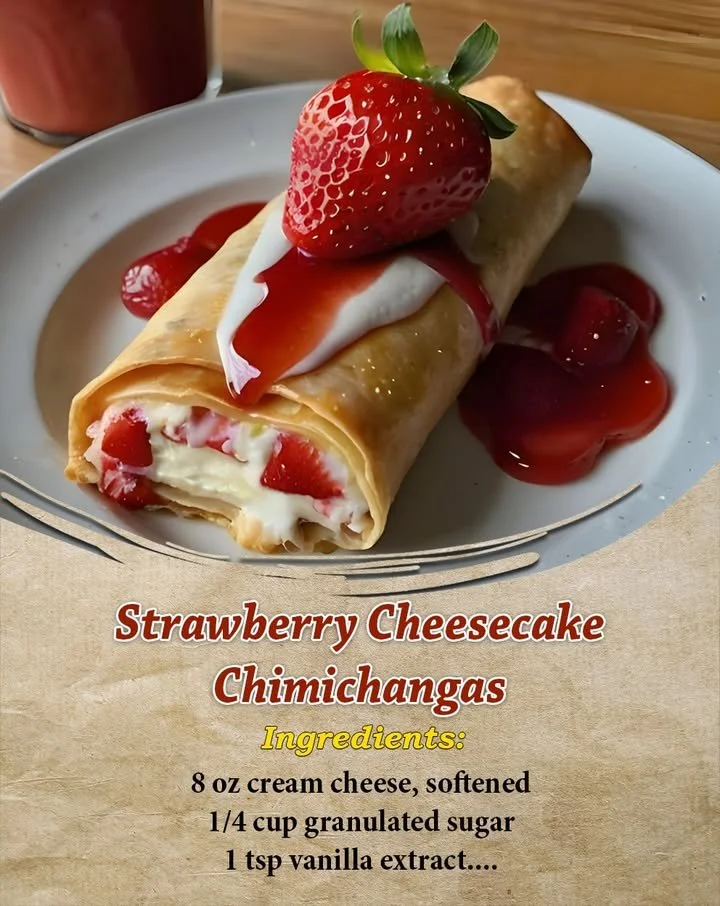
Start by beating the softened cream cheese, 1/4 cup of granulated sugar, and vanilla extract in a medium bowl until it’s smooth. Carefully fold in the diced strawberries and lemon juice. This creamy mixture is what makes these chimichangas truly special!
Fill the Tortillas
Lay your flour tortillas out flat on a clean surface. Spoon a generous amount of that lovely strawberry cheesecake filling right in the center of each tortilla. Then, roll them up tightly like burritos, folding in the sides to keep that delicious filling secure.
Coat the Chimichangas
Now, you’ll need to choose your cooking method. Preheat your oven to 400°F (200°C) if you’re baking, or heat a deep fryer to 350°F (175°C) for frying. In a small bowl, mix together the remaining 1/4 cup of sugar and the ground cinnamon. Brush the outside of each chimichanga with melted butter, then roll them in that cinnamon-sugar mix until they’re fully coated.
Bake or Fry
For baking: Arrange the chimichangas on a parchment-lined baking sheet and bake for about 12-15 minutes or until they’re golden and crispy. For frying: Cook the chimichangas in hot oil for about 2-3 minutes on each side, until they achieve that perfect golden hue. Once done, drain them on paper towels to absorb some of that extra oil.
Serve
Let the chimichangas cool slightly before serving. For that extra touch, feel free to top them with whipped cream, a dusting of powdered sugar, or a drizzle of chocolate syrup. Enjoy the delicious contrast of textures and flavors!
Best ways to enjoy it
These Strawberry Cheesecake Chimichangas are at their best when served warm. Plating them with a generous dollop of whipped cream and a sprinkle of powdered sugar makes for a stunning presentation. They pair wonderfully with fresh mint leaves to add a touch of color and freshness. If you’re looking to elevate your dessert, consider serving them alongside a scoop of vanilla ice cream for a decadent treat.
How to store & freeze
If you happen to have leftovers (which is rare!), store them in an airtight container in the refrigerator for up to 2 days. To reheat, just pop them in the oven at 350°F (175°C) until warmed through. For longer storage, you can freeze the unbaked chimichangas. Just wrap them tightly in plastic wrap and freeze for up to a month. When you’re ready to enjoy, simply bake from frozen, adding a few extra minutes to the cooking time.
Helpful cooking tips
- Use fresh ingredients: Fresh strawberries will give you the best flavor in your chimichangas.
- Don’t overfill: Be careful not to overstuff your tortillas; otherwise, they may burst while cooking.
- Experiment with flavors: Try adding a splash of almond extract for a different layer of flavor or mix in some chocolate chips for an extra decadent treat.
Creative twists
Feel free to customize this recipe to suit your taste! Use different fruits like peaches or cherries for unique flavor profiles. If you’re feeling adventurous, try adding a twist of orange zest into the filling for a zesty kick. You could also turn these into savory chimichangas by substituting the cheesecake filling with a mixture of cream cheese, herbs, and your choice of savory ingredients.
Your questions answered
How long does it take to prepare?
This delicious recipe takes around 25-30 minutes from start to finish, making it perfect for quick desserts.
Can I substitute cream cheese?
Yes! You can use mascarpone cheese for a richer flavor or a dairy-free cream cheese alternative if you’re looking for a vegan option.
How should I store leftovers?
Place any leftover chimichangas in an airtight container and store them in the refrigerator. They can last for up to 2 days. If you want to enjoy them later, freeze them before baking for a simple treat later on!
Indulging in Strawberry Cheesecake Chimichangas is more than a recipe; it’s a delightful experience that brings joy to any situation. Give these a try, and I’m sure they’ll become a new favorite in your cooking rotation!